Main Menu

Stahlhelm (Steel Helmet) M1916, M1917 oder M1918
All members of JR63 must have a M1916, M1917 or a M1918 Stahlhelm, which will be worn during all mid- and late-war scenarios. In WWI reenacting, we wear a Stahlhelm for a reason - we have working mortars!

An original M.1916/17 Stahlhelm
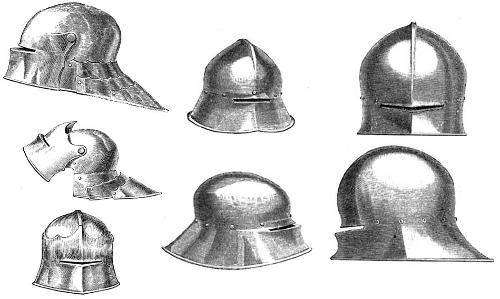
This image of German sallets comes from Dictionary of French Architecture from 11th to 16th Century (1856) by Eugène Viollet-le-Duc.
At the beginning of World War I, none of the combatants were issued with any form of protection for the head other than cloth and leather caps. When trench warfare began, the number of casualties on all sides suffering from severe head wounds (more often caused by shrapnel bullets or shell fragments than by gunfire) increased dramatically, since the head was typically the most exposed part of the body when in a trench. The French were the first to see a need for more protection—in late 1915 they began to issue Adrian helmets to their troops. The British and Commonwealth troops followed with the Brodie helmet, which was also later worn by US forces, and the Germans with the Stahlhelm.
The design of the Stahlhelm was carried out by Dr. Friedrich Schwerd of the Technical Institute of Hanover. In early 1915, Schwerd had carried out a study of head wounds suffered during trench warfare and submitted a recommendation for steel helmets, shortly after which he was ordered to Berlin. Schwerd then undertook the task of designing and producing a suitable helmet broadly based on the 15th century sallet, which provided good protection for the head and neck.
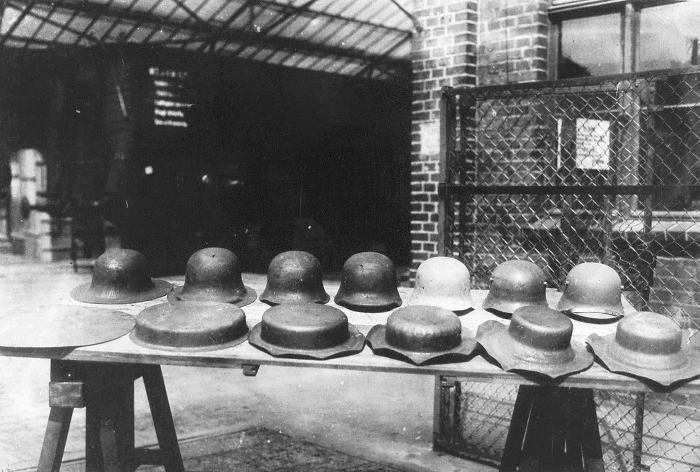
Photo above showing the different
stamping stages.
After lengthy development work, which included testing a selection of German and Allied headgear, the first Stahlhelms were tested in November 1915 at the Kummersdorf Proving Ground and then field tested by the 1st Assault Battalion. Thirty thousand examples were ordered, but it was not approved for general issue until New Year 1916, hence it is most usually referred to as the "Model 1916". In February 1916 it was distributed to troops at Verdun, following which the incidence of serious head injuries fell dramatically.
The basic helmet shell is formed from one steel disk, and went through at least nine stamping stages before it reached its final shape. The helmet's liner is held in place with 3 split rivets. The liner was made of a leather band in 1916 but material shortages caused a switch to a sheet metal band by 1917. To both of these bands were attached three leather tabs each with a pocket that could contain pads or padding - which formed a very efficient internal sizing system.
The liner was designed so that the helmet would remain 1 finger width away from the head at the sides, and two at the top. This was to prevent injuries to the head by objects striking the helmet and denting it. For the M.1916 and M.1917, the rivets at the lower side skirts fasten M1891 Pickelhaube side posts, to attach the M1891 Pickelhaube chinstrap. The M.1918 liner was virtually identical to the M.1917 except ring attachments were added to the sides where the chinstraps ends attached. The new two-piece chinstrap now has a spring hook that connected under the chin - this was a far more efficient system than the Pickelhaube chinstrap offered.
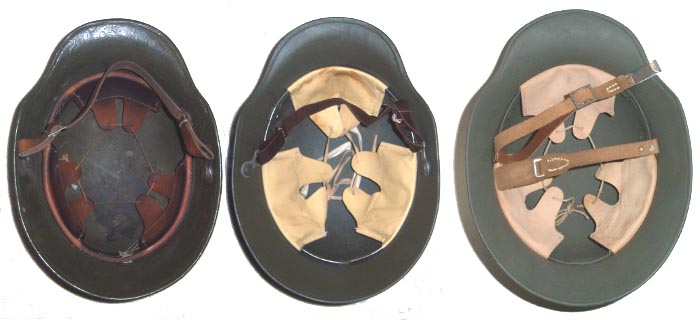
From left to right: M.1916 leather band liner, M.1917 sheet metal band liner,
and M.1918 with improved chinstrap.
Achtung! Stahlhelm size chart
The Stahlhelm was made in six different sizes, and two different styles of liner and you must make sure that you get the right combination so your Stahlhelm fits you correctly! The size of the shell can be found stamped into the left inner-side of the neck apron, if that is un-readable, you can measure the circumference of the helmet on the outside along the line of the liner rivets - subtract roughly 1 centimeter from this dimension and that will be the shell size. The M16 liner is a very thick leather band, and this takes up a lot of space. The M17 liner is thin sheet metal and you can gain usable space over the M16 liner. The following chart breaks down the usable space by shell and liner combination. There are general measurements, if you fall close to transition from one size to the next, we recommend finding another reenactor and try on his helmet. To figure out your size, simply take a cloth tape measure, and using the metric side, measure around you head above the eyebrows.

When worn correctly, the visor should be level with the eyebrows; this height can be adjusted somewhat with the liner.
Original photo of a group of Soldaten all wearing Stahlhelms
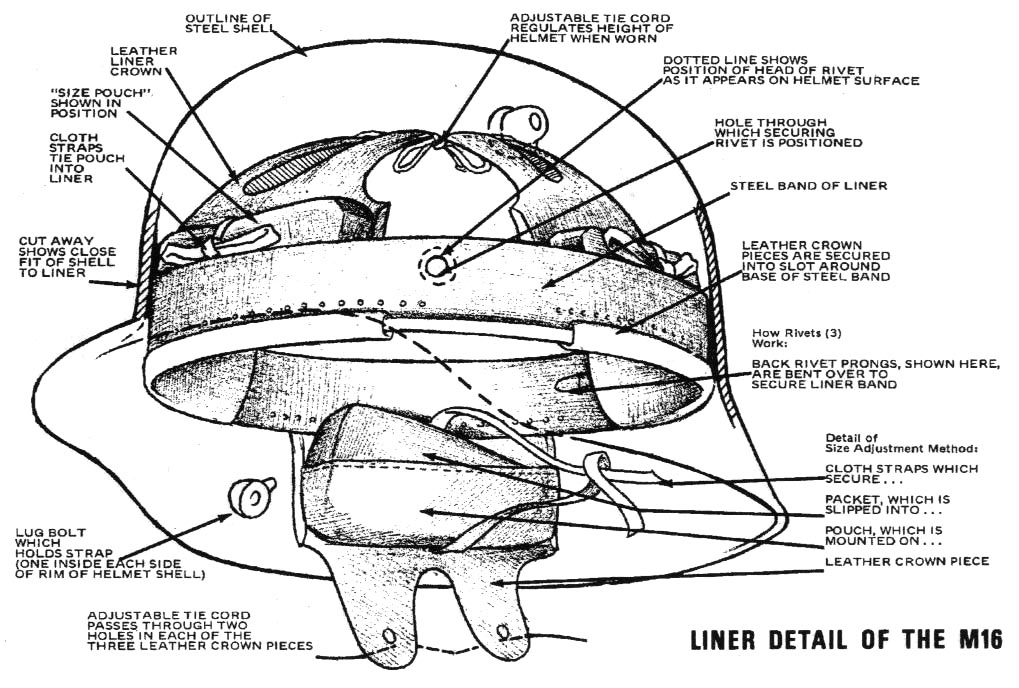
Diagram from Stahlhelm - Evolution of the German
Steel Helmet
by Floyd R. Tubbs and Robert W. Clawson.
Helmet Fit/Adjustment
The WWI German Stahlhelm was designed with several adjustment features to aid the wearer in comfort and proper fit for maximum protection. The liner has three tabs, each with a pocket, positioned around the perimeter of the helmet band. The pockets contained padding that could be increased or decreased, or the material could be softer or firmer to make sure the helmet fit snug and to the wearer's liking.

As seen in the photo at right, there is an adjustment tie cord inside the dome of the
helmet running through the fingers if the liner. For proper adjustment, this cord should
be tied so that there is only a finger's thickness worth of space between liner and
helmet when being worn.
Helmüberzugen (Helmet Covers)
Soldiers in the field were known to fabricate helmet covers from sandbags and other fabric, but the first issued helmet covers were white helmet covers issued to troops in the winter of 1916/17 to help make them less visible in the snow. The was followed shortly in February 1917 with covers issued in gray. These covers were similar to Pickelhaube covers with small hooks around the perimeter that secured the cover to the flare of the steel helmet. Leather reinforcements were stitched to the inside around holes cut for the lugs.
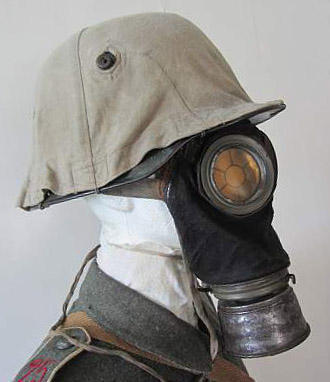
An original canvas Helmüberzugen
with Lederschutzemaske
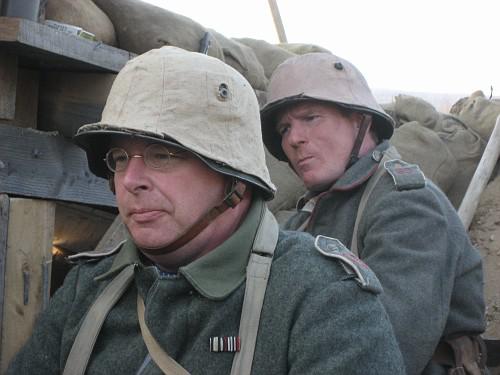 Two of JR63's own sporting
Helmüberzugen.